How to assemble and disassemble my Philips Juicer
Published on 07 September 2023
If you want to know how to assemble and disassemble your Philips Juicer, follow the instructions below.
Steps to assemble and disassemble
Please follow the steps below and watch the video for instructions:
Disassembling the parts is done in the reversed order.
Tip: When you finished juicing, rotate the spout to activate the drip stop, open the clamps or locking arm, and take the juicing unit in one piece off the motor to the sink to avoid splashes on your countertop.
- Attach the parts onto the motor unit in the following order, aligned with the safety mechanism on the side of the juicer.
- Pulp container
- Juicer collector with spout
- Filter (push down until snapped in)
- Lid
- Pusher
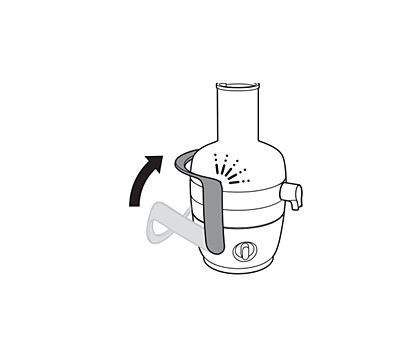
- Close the safety clamps or locking arm (depending on your juicer model)
Disassembling the parts is done in the reversed order.
Tip: When you finished juicing, rotate the spout to activate the drip stop, open the clamps or locking arm, and take the juicing unit in one piece off the motor to the sink to avoid splashes on your countertop.
Play Pause
Avance Collection Centrifugal Juicer only (models HR1915-1925):
The information below applies to Avance Collection Centrifugal Juicer only (models HR1915-1925).
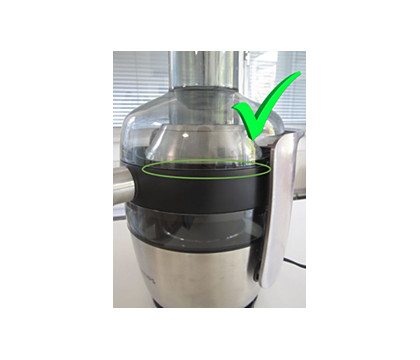
- Ensure that there is no gap between the juice collector and the lid (see image below).
- Also, make sure that the locking arm is properly mounted on both sides of the lid (fixed above both buttons of the lid) and snapped in place (see image below).
- Section Attachment PDF file, published 2023-09-07


