Please follow these simple steps to enable your PC for media sharing.
How to enable your PC for media sharing (Windows 7)
Published on 2017-02-28
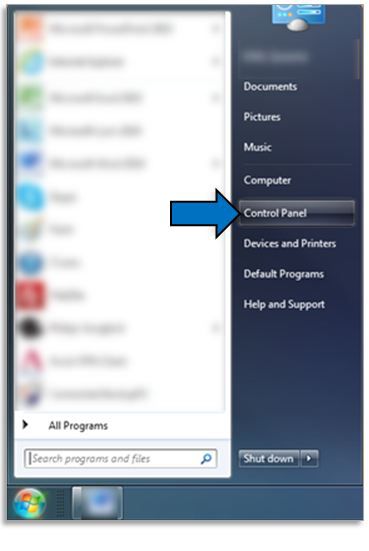
1. On your PC, click on the Windows logo and go to Control Panel
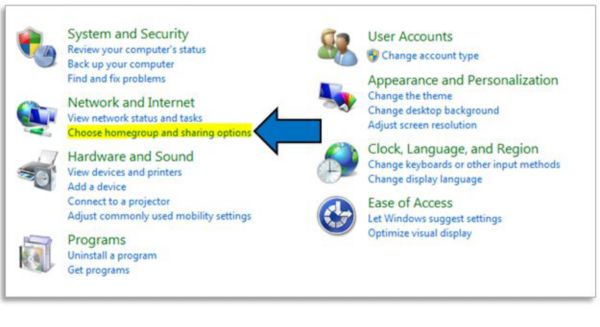
2. Under ‘Network and Internet’ click on Choose homegroup and sharing options
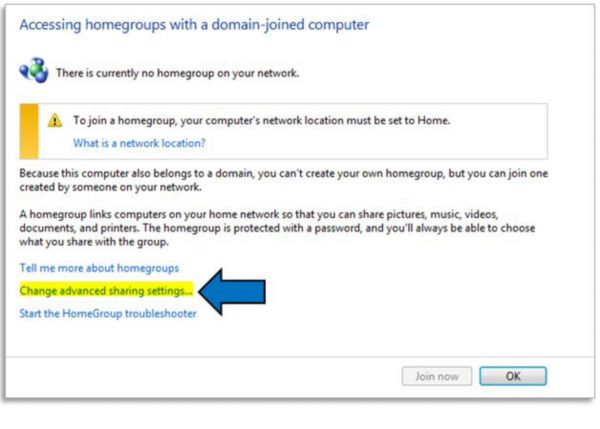
3. Click on Change advanced sharing settings
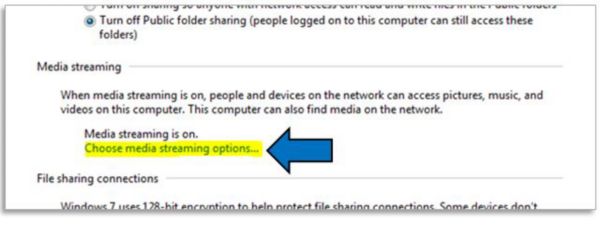
4. Scroll down and locate Media streaming
Under Media streaming, click on Choose media streaming options
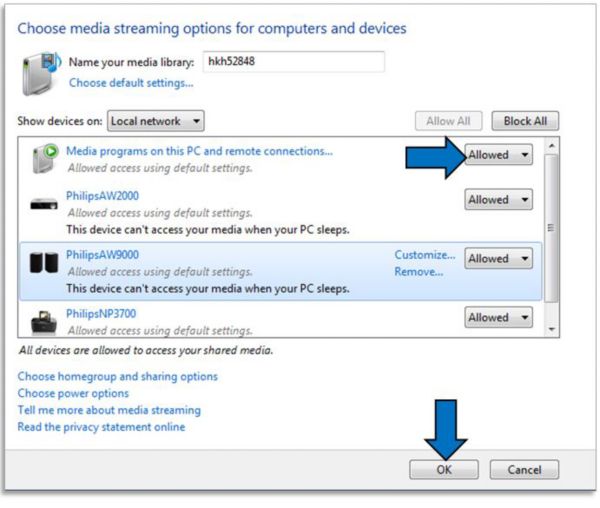
5. The following screen would be displayed
Make sure:
- Your digital media device (e.g., your home media player, or your wireless Hi-Fi) are in the same local network as your PC
- Your digital media device (e.g., your home media player, or your wireless Hi-Fi) are set to ‘Allowed’ instead of ‘Blocked’. Select your device and then click ‘OK’ to proceed.
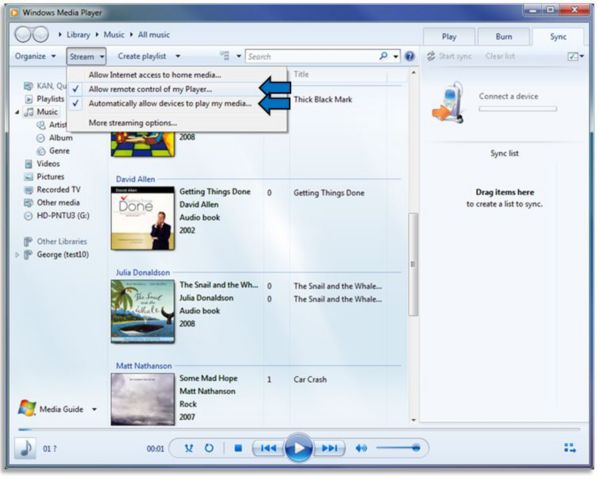
6. Configure settings in your music and video library in the PC
- For example, if you use Windows Media Player as your music and video player, under Stream options, check Allow remote control of my player and Automatically allowed my device to play my media.
7. The streaming settings are now configured
You can now stream the media from your PC to your digital media device.
